Saturday, October 23, 2010

Baby Thank Yous


A friend of mine is expecting a girl in December and registered at Target. As I was admiring the crib set she chose, it occurred to me that it looked a lot like scrapbook paper. You can see the set here and be sure to check out all 5 of the images! My mind started racing. So, with a little cutting and pasting with the images from the website, I made my own 'paper' which I then turned into these adorable thank you notes. I cut 1.25" squares, then glued them to a square backing. I stamped some faux stitches and then ran it through the Cuttlebug to 'quilt' it. (Click on the picture for a close-up). I made a dozen of them in front of the tv last night and will work on more tonight. The best part about these is that I used scraps of paper and ribbon that I had on hand, so I didn't need to buy a thing. I think she's going to love them, and I may just have to do this for EVERY baby gift from here on out!!!

Wednesday, October 20, 2010

Simple and Elegant


It's so hard to get a good picture of this card, so you'll have to trust me that it's absolutely darling in real life! I made a ton of these since they were so easy, and I used up a bunch of the gemstones that I've been hoarding. I totally stole the idea from this card.

Sunday, October 10, 2010

Birthday Invites


How is it possible that Abby is going to be turning 7? Time has truly flown. I am NOT one of those parents who goes all out for parties. We have a simple little gathering with a few of her close friends... this year, there will be a maximum of 7 kids (including her and Jojo) and I'm calling it a 'crafting' party. I bought some ornament kits at a yard sale in the spring that we'll use, and she also wanted to make some cards (Can Do!), so it should be pretty easy.

I only needed to make 4 invitations (two of the guests are twins) which hardly seemed worthwhile. I came up with this design and made 8 of them, so now I have 4 extras that will be used as birthday cards in the future. I colored with Copics but didn't mess with shading because lets face it, the kids aren't going to notice. (That and I have trouble shading the dress in this image because it's such a large expanse!) Of course I had to add some Stickles and CB embossing!

Friday, October 01, 2010

Orange!


It's been awhile since I participated in a challenge over at Copic Creations, but this week the theme was orange and I wanted to get my creative mojo back so I thought I'd give it a whirl.

I posted a similar card awhile back, but I really wanted to bring more color to the image, and I knew orange would really make him pop. There's a new "Rolling By" set featuring the same adorable kids in the newly released Fall Supplement. I just can't get enough of them!

Fall Supplement is Online!

I'm so thrilled! You can view the publication HERE. I am in love with the realistic stamps and MUST have the Christmas Reindeer set!

Wednesday, September 22, 2010

Beth Moore!


I had the wonderful opportunity to go see Beth Moore live this past weekend with several MOPS Moms and it was such a great experience. She spoke on Proverbs 31:26, so I decided to make some cards to send out to the amazing women I attended with. As soon as I saw this card I knew I was on to something. I changed up the colors and made it my own, and I LOVE how it turned out. I did the wording on the computer using the Fling Font (which was used on the Living Proof Live brochure) and added some Crystal Effects on the butterfly. And of course I had to use my Cuttlebug to emboss the swirls.

Sunday, September 19, 2010

Get 'em before they are gone!

TAC™ Promotions

Page Number/Item Number/Set Name/Sale Price

7 T3138 Spring Things $ 9.07
8 T2937 More All Season Stamps $12.57
9 T3214 Snowflake Backgrounder $ 6.27
9 T3213 Build-A-Bird $15.37
12 T2926 Autumn Swirls $15.37
12 T3192 Tree Owls $ 9.07
13 T2632 Pick of the Patch $ 9.07
13 T3106 Apple Girls $ 9.07
14 T3078 Nuts About You $12.57
16 T3178 Hedgehog Halloween $12.57
Pg Code Description Reduced
Price
17 T3107 Spooky Girls $ 9.07
17 T3179 Spooky Boys $ 9.07
18 T3081 Spookalicious $12.57
18 T3191 Fun Skulls $12.57
19 T3009 Glitter Goblins $15.37
24 T2976 Homespun Holiday $15.37
29 T3187 More Hotel Signs $15.37
30 T3190 Squirrely Girl $12.57
32 T886 Silhouette Nativity $15.37
33 T3045 Holiday Collages $15.37
35 T2518 Little Penguins $ 6.27
35 T2589 Christmas Minis $ 6.27
37 T3199 Peace on Earth $12.57
38 R3037 Holiday Cheer $16.77
39 T2707 In The Snow $15.37
41 T3202 The Coolest $15.37
42 T3200 All Things Christmas $12.57
44 T3195 Party Animals $ 9.07
44 T3194 Open Presents $ 9.07
45 T3215 I Heart You $15.37

Wednesday, September 15, 2010

So easy, even a 6 year old can do it!


Abby decided she wanted to make a card for her friend Bella, who has been in the hospital for several weeks. I showed her some of the card kits I'd made up for last months class, and she loved the flower. Everything was precut, but she chose her colors and glued everything down. She even wrote the inside all by herself. I guess her early training paid off! :-)


I decided to ink up another new set this afternoon. The top card was a simple one I threw together as a sample for my MIL to take home with her. The bottom one, which I love, was inspired by this card at SCS. The hardest part was getting the math right with the measurements, but now that that's done, I'm totally going to make a bunch of these!

Saturday, September 11, 2010

Stamping with the MIL


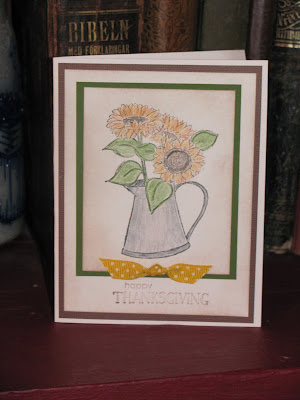
So my mother-in-law has retired now and decided she wants to start stamping. I ordered a couple of basic stamp sets for her and the UPS man delivered them yesterday right after the in-laws arrived! We spent last night playing and these are the results. I can't decide which is my favorite, the stars or the blue flower. I am absolutely loving the Linear Sentiments set because it's so good for so many types of cards. Birthday, Baby, Get Well, Anniversary/Wedding, Get Well, Just Because... you name it! I also love the Sunflowers Set. I used colored pencils here, but I think next time I'll use Copics for better blending.

Wednesday, September 08, 2010

Sympathy


I needed a Sympathy card this past week for a friend who very unexpectedly lost her mom. I have been saying for months that I need to make some Sympathy cards to have on hand, but alas... it hasn't happened. So I typed up my favorite poem (it's been in my Bible since I lost my grandmother in 1984), cut it out with my Nesties, and added some paper from the stash. Simple but effective.

Friday, September 03, 2010

Peachy Keen


In my attempt to clean out our three freezers before Uncle Sam tells us it's time to move again, I found a bag of frozen peaches and decided to try my hand at making jam. I used THIS recipe and it was so easy and tasty. So when a friend invited us over for a bbq on Sunday, I knew just what I'd use for my hostess gift. I used one of my new sets from MFT (it's wonderful because you can fill the basket with peaches, apples, strawberries, or tomatoes!) and then decorated the mason jar to match. And then, of course, I ran out and bought 3 more cases of jars so that I can make more to have on hand for those times when I need a little gift but don't have the time to go buy something!

Thursday, August 19, 2010

I FINALLY WON!!!!

Every month, TAC has contests for the demonstrators. One of the categories is always "Terrific Trio" and the rule is that you have to make 3 different cards using only 2 stamp sets.

After 6 years of entering off and on, I FINALLY won. And I get to choose $100 worth of TAC products as my prize. WOO HOO! To say I was excited would be an understatement!

You can see the winning cards HERE. Mine is the last one, so click on it and all 3 cards will come up.

Wednesday, August 11, 2010

Organic is the new sexy!


I had so much fun with this one! It's a laminated card that I can keep in my purse, because I have such a hard time remembering what fruits and veggies are on the Dirty Dozen/Clean Fifteen list. So, I printed out a copy of the list on cardstock, then added this image from My Favorite Things ("Who's That Girl Goes Green" set) to the other side. I think I'll make a few more up for some friends who have begun buying organic when they can. (As a side note, if you haven't read "The Omnivore's Dilemma" or seen "Food, Inc." I highly recommend both. They will change the way you eat forever.)

New Stamps!


Shhh! The postman delivered some new stamps the other day, so I couldn't wait to ink them up! This time, I got several of the organic/gardening stamps from My Favorite Things. I love this set in particular because the fruit is separate from the basket, so she can carry apples, peaches, strawberries, or tomatoes! I paper-pieced her shirt using the checked paper I found in my stash, and again, I used the Set A papers from TAC.

Thursday, August 05, 2010

Berry Thanks


More berries from Flourishes. I cut the fancy frame from my Nestabilities. I haven't had the time to play with the berry stamps as much as I'd like, so stay tuned. Hopefully I'll have some more cards soon!

Berry Fun!


It was so nice to come back from vacation and have new stamps waiting for me to ink up! I ordered several sets from Flourishes and so far, I'm loving the beautiful images. As a rule, I try to use TAC stamps whenever I can, but for beautiful, ornate, realistic images, I have to look elsewhere. I did, however, stick to the TAC Color Caboodles Set A for cardstock and Copic Colors. It's so easy and brainless to color an image and not have to worry about finding a matching cardstock.

Monday, July 12, 2010

Masculine Sympathy


I don't know about you, but I NEVER have Sympathy Cards when I need them. Or Masculine Cards. They are both a challenge to me. So Masculine Sympathy Cards are a super challenge. Tonight I decided to ink up my new Water Color Plants set and see what I could come up with. It's not fancy, it's not ornate or complicated, but I liked the way it turned out. I was happy to find that I had some ribbon on hand that perfectly matched my Jacaranda Cardstock. I added some brown cardstock and brown ink (Hybrid Palette Burnt Umber) and ran one sheet of white cardstock through my Cuttlebug to add some texture. I resized the picture too small, but you can click on it to bring up a larger picture.

Sunday, July 11, 2010

Window Box Tutorial

I have spent many hours during the past two days playing with this new set, and have finally figured out how to make the window cut-out in a fairly efficient way that doesn't involve precise stamping. If you color with pencils, it would be easier and several of these steps could be eliminated, BUT I prefer copics. Unfortunately, they show through the back side of cardstock, so that's where the complication arises for this particular card. It's not as easy as stamping and coloring... it entails lots of cutting, too.

This is my first tutorial so I hope you like it, and I hope it saves you some headaches...

The first step is to create your template for the window. Stamp the window and then cut it out, using the OUTER frame for the inner square. (That's a little confusing, I know, but you want the inside square, the part that's cut away, to be larger.)


Using your template, trace the INSIDE square onto the front of your card, centering it from left to right.
Carefully cut out the window.
On another piece of cardstock, stamp the window, the back of the girl, the girls face, and the window box and flowers.
Color them in. I used Copics, of course!
Cut out all of the pieces. To get the inside of the window 'started', I used my Cropodile to punch a hole.
Cut out the insides of the windows.
If you want a sentiment on the front, now is the time to do it (in the event of a mess-up, it won't be the end of the world.) Attach the shutter piece to the front of the cardstock, aligning the windows.
Attach the girl to the inside of the card, again aligning the windows.
Her head will show through, and that's a good thing!
Glue her face on!
Attach the window box and flowers
This is what your inside will look like.

Another One


So there was a card similar to this in the new catalogue and I wanted to try my hand at it. MAJOR pain in the neck! But it's cute, anyway! It obviously uses the same set as yesterday's post but this time you get to see the use of the window box, flowers, and the back of the girl. I *think* I thought of an easier way to do it, so I'll have to keep trying...

Saturday, July 10, 2010

Brandy New Stamps!

The nice UPS man delivered my box of new toys yesterday, so the first thing I did when I woke up this morning was put together this adorable card... perfect for 'thinking of you'. The patterned paper is from the new 'Maggie' set, and the stamp is from a set called Window Box Wonder. I just love the expression on her cute little face! I colored her using the Copic Markers from the Copic Caboodle A Set and I used matching cardstock, from the Color Caboodle A Set. The seven new coordinating marker/paper sets make things SOOO much easier!!!

Thursday, July 08, 2010

Awareness


Before you know it, October will be upon us. So, I decided to play with the Sizzix Breast Cancer pack I bought last year. It came with a couple embossing plates and die cuts. And, of course, there's my favorite swirls background! Are you getting sick of these flower embellishments yet?

Wednesday, July 07, 2010

Changing it up


I found this floral paper in my stash and was inspired. It's from the discontinued "Belle Flora" paperline from TAC. I decided to change it up and make a square card. I love this basic design because you can change out the sentiment and easily have a birthday or even baby girl card. And I didn't use the Cuttlebug on it, can you believe it? Just punches.

Baby Boy


I find it much easier to make baby girl cards. But I thought this would be perfect for a baby boy. I love the Cuttlebug Swirls folder with anything boat related because they look like waves. I used my Nestabilities to cut the oval and scalloped frame and colored with my Copics.

More of the Same

These are the very same design as the baby cards I posted the other day, but I changed the colors and ribbons. Quick, easy, and handy to have on hand.

Monday, July 05, 2010


Ok, you'll probably need to click on this one to bring up a bigger picture because it's hard to see. I needed a last-minute baby gift today, so I threw together these thank-you notes. I used the 'thanks' embossing folder for the Cuttlebug, added some ribbon, and a flower made the same way as yesterday's post. I think I'm about to make a ton of these in non-baby colors because they will be really pretty 'thank you' notes.

I've been using my 'bug so much lately because I love it, it makes for quick and easy cards, and also because my friend Anita will be getting one delivered in a few days. Since hundreds of miles separate us and we can't craft together, I thought I'd at least post some ideas for her!!!

Sunday, July 04, 2010

No stamping required


Tonight I dug into my paper pile and am pleased with the results. The patterned paper came from a DCWV stack that I cut apart. I used a flower punch and also my Swiss Dots Cuttlebug, buttons I bought at a yard sale, and that's about it! Very simple, easy to do in front of the tv, and I now have 8 elegant cards for my depleted stash. I think I'll stamp "Congratulations" in the inside and turn them into baby cards, although the purple would also make good 'thank you' notes now that I think about it!

Friday, July 02, 2010

Give Away!


The Angel Company is giving away an awesome prize package! Enter to win here. Maggie is one of our new double-sided paper packs and I happen to think she's beautiful!

Wednesday, June 30, 2010

New Catalogue


I am SOOO excited about the new TAC Catalogue. We now have SEVEN sets of matching Copic Markers and Bazzill paper (which you can buy in packs of 25 for those bulk projects!) and almost 90 new stamp sets!!! Prices have been rolled back, and we also have 2 brand new sets of exclusive, double-sided paper packs. As you can see, the cover is GORGEOUS.

As we speak, I am working on getting my lanette.ismyangel.net website back up and running because I am wanting to get back into stamping! I will let you know when it happens, but your 24 hour shopping will be here soon :-)

Monday, February 22, 2010

Sympathy


Seriously... I never need just one Sympathy Card. I swear they really DO come in threes... I needed two masculine cards and this is what I came up with. It's simple but it does the trick. I think it's the first time I've used my "Love and Laughter" tree set from TAC, so I'm happy it finally got inked up. The ribbon is a little too thin for my taste, but it's the only brown that I have, so it's going to have to do. And of course I used my Nestabilities! I'm so addicted.

Tuesday, February 09, 2010

Little Boy Birthday


I've had this paper from TAC for forever. Having 2 girls of my own, I had no clue what I was going to use it for. Then I decided to pair it with the cute little fisher-boy from Wonder and Joy and VOILA! I used pop dots to add some interest, since it's such a ridiculously simple card. I colored with Copics. Inside says "Fishing you a very Happy Birthday!"

More Cuties


This card is another one using the new "Wonder and Joy" set from the 2010 Serendipity. It was so easy and simple, which is probably why I love it so much. I used my Fiskars border punch and colored with Copics. Add a ribbon and done!

Sunday, February 07, 2010

Cool Video!

I found a really neat video here on how to make adorable flowers for cardmaking. Check it out! I made one with today's newspaper... now have to figure out how to incorporate it into a card!

Saturday, January 30, 2010

Thankzzzzzzz


Used another new set of Nesties for this one, along with a bee image from one of the new hostess sets from Serendipity Street. I added Stickles to the wings (of course!)